A new version of the code here:
import pygame


screen = pygame.display.set_mode((800, 600))
buttons = pygame.sprite.Group()
class Button(pygame.sprite.Sprite):
    ''' Create a button clickable with changing hover color'''

    def __init__(self, text="Click",
                pos=(0,0), fontsize=16,
                colors="white on blue", hover_colors="red on green",
                command=lambda: print("No command activated for this button")):

        super().__init__()
        self.text = text
        self.command = command
        self.colors = colors
        self.original_colors = colors
        self.fg, self.bg = self.colors.split(" on ")
        self.fgh, self.bgh = hover_colors.split(" on ")
        self.font = pygame.font.SysFont("Arial", fontsize)
        self.pos = pos
        self.create_original()
        self.create_hover_image()

    def create_original(self):
        self.image = self.create_bg(self.text, self.fg, self.bg)
        self.original_image = self.image.copy()


    def create_hover_image(self):
        self.hover_image = self.create_bg(self.text, self.fgh, self.bgh)
        self.pressed = 1
        buttons.add(self)


    def create_bg(self, text, fg, bg):
        self.text = text
        image = self.font.render(self.text, 1, fg)
        self.rect = image.get_rect()
        self.rect.x, self.rect.y = self.pos
        bgo = pygame.Surface((self.rect.w, self.rect.h))
        bgo.fill(bg)
        bgo.blit(image, (0,0))
        return bgo


    def update(self):
        ''' CHECK IF HOVER AND IF CLICK THE BUTTON '''
        if self.rect.collidepoint(pygame.mouse.get_pos()):
            self.image = self.hover_image
            self.check_if_click()
        else:
            self.image = self.original_image


    def check_if_click(self):
        ''' checks if you click on the button and makes the call to the action just one time'''
        if self.rect.collidepoint(pygame.mouse.get_pos()):
            if pygame.mouse.get_pressed()[0] and self.pressed == 1:
                # print("Execunting code for button '" + self.text + "'")
                self.command()
                self.pressed = 0
            if pygame.mouse.get_pressed() == (0,0,0):
                self.pressed = 1


if __name__ == "__main__":
# Hello, this is a snippet

    pygame.init()

    pygame.display.set_caption('Example of button')
    screen = pygame.display.set_mode((1000, 800))
    clock = pygame.time.Clock()

    def window():
        b1 = Button("CLICK ME", pos=(100,100),
            fontsize=36,
            colors="red on green",
            hover_colors="green on red",
            command=lambda: print("clicked right now"))


    window()


    is_running = True
    while is_running:

        for event in pygame.event.get():
         if event.type == pygame.QUIT:
             is_running = False

        # to show buttons created
        buttons.update()
        buttons.draw(screen)

        pygame.display.update()
        clock.tick(60)

    pygame.quit()

If you go over the button, it will change the color. If you click it it will do some action (in the example, it will just print a text on the terminal.
Repository
https://github.com/formazione/pygame_widgets
There’s an update to this code, you can find it at the end of this post and also in this new post: https://pythonprogramming.altervista.org/button-widget-in-pygame-updated/. I added the command to each button. The style is sick, so, go check it.
Welcome to our blog about creating buttons in Pygame! In this post, we will be discussing the step-by-step process of creating buttons in Pygame. Buttons are an essential element of any user interface, and they allow users to interact with the program. Pygame provides an easy and straightforward way to create buttons for your game or application. We will cover topics such as creating a basic window, creating a class for the Button, rendering text to show on the button, creating a surface with the size of the text, giving the surface a color or image, blitting the text on the surface, creating a method to change the text of the button, blitting the button surface on the screen, and intercepting the click of the mouse. By the end of this post, you will have a solid understanding of how to create buttons in Pygame and implement them into your projects.
Github repository with the code for buttons in pygame
Click on this link to get the code to make buttons with pygame.
https://github.com/formazione/pygame_button
Repository with a quiz that uses buttons and labels in pygame
https://github.com/formazione/pygame_quiz.git
How to make a button in pygame
So here is the steps we will follow in the process of making a button:
- create a basic window
- create a class for the Button
- render the text to show on the button
- create a surface with the size of the text
- give the surface a color (or an image as background… I can make this in another post)
- blit the text on the surface
- create a method to change the text of the butto (when you click for example)
- blit the button.surface on the screen
- intercept click of the mouse
Live video coding of pygame button
Github repository
Code
The code provided is an example of how to create a button in Pygame using Python.
Initializing pygame

The first line of the code imports the Pygame module, which provides access to the Pygame library.
The second line initializes Pygame and sets up the Pygame environment.
The third line sets the screen size to be 500 pixels wide and 600 pixels tall. The screen variable holds a reference to the display surface, which is where all the drawing will take place.
The fourth line creates a clock object that will be used to regulate the frame rate of the game.
The fifth line creates a font object using the Arial font with a size of 20 pixels.
The Button class
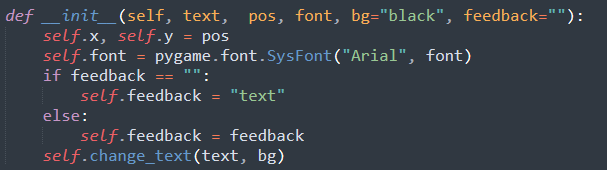
The next lines of code define a Button class. The Button class takes several arguments, including the text to display on the button, the position of the button, the font size to use, the background color of the button, and the feedback text to display when the button is clicked.
The __init__ method of the Button class initializes the attributes of the Button object. It sets the position of the button, the font size, and the feedback text. It then calls the change_text method to set the initial text of the button.
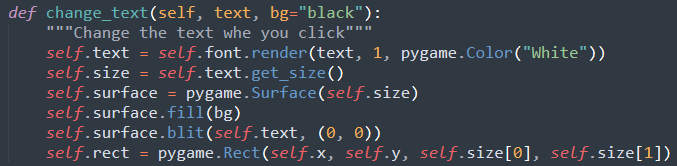
The change_text method of the Button class changes the text displayed on the button when it is clicked. It takes the new text as an argument and sets the text attribute of the Button object. It then creates a new surface for the button with the new text and background color. Finally, it updates the Rect object of the Button object with the new size of the button.
The show method of the Button class blits the Button object’s surface onto the screen at the specified position.
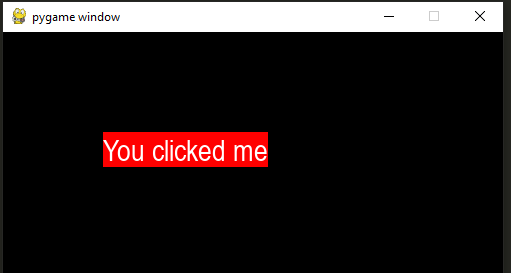
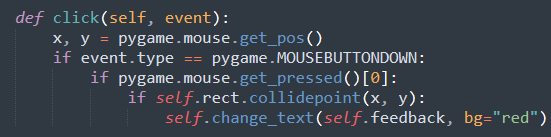
The click method of the Button class handles the button clicks. It checks if the left mouse button is clicked and if the mouse is within the boundaries of the button. If both conditions are true, it changes the text of the button to the feedback text and updates the button surface with the new text and background color.
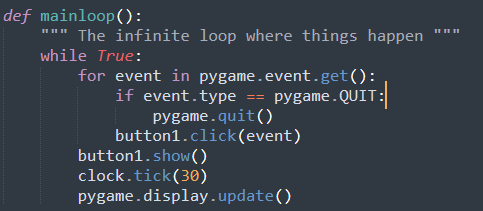
The mainloop function is an infinite loop that runs the game. It waits for events and handles them. It also calls the show method of the Button object to display the button on the screen. Finally, it updates the screen and regulates the frame rate of the game using the clock object.
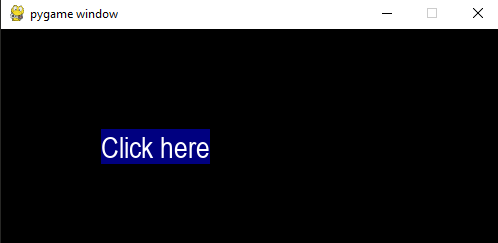
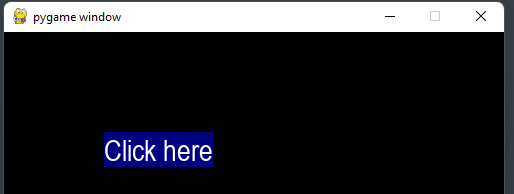
At the end of the code, the button1 object is created using the Button class. It is given the text “Click here,” the position (100, 100), a font size of 30 pixels, a background color of navy, and the feedback text “You clicked me.” The mainloop function is then called to start the game.
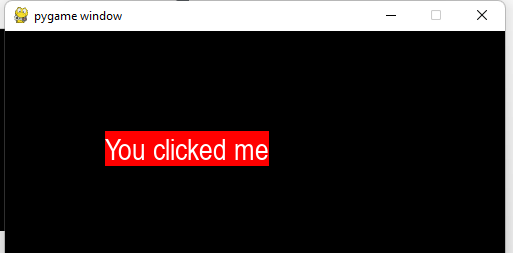
Overall, this code provides an excellent starting point for creating buttons in Pygame using Python. It demonstrates how to create a Button class, handle button clicks, and update the button’s text and appearance.
import pygame

pygame.init()
screen = pygame.display.set_mode((500, 600))
clock = pygame.time.Clock()
font = pygame.font.SysFont("Arial", 20)


class Button:
    """Create a button, then blit the surface in the while loop"""

    def __init__(self, text,  pos, font, bg="black", feedback=""):
        self.x, self.y = pos
        self.font = pygame.font.SysFont("Arial", font)
        if feedback == "":
            self.feedback = "text"
        else:
            self.feedback = feedback
        self.change_text(text, bg)

    def change_text(self, text, bg="black"):
        """Change the text whe you click"""
        self.text = self.font.render(text, 1, pygame.Color("White"))
        self.size = self.text.get_size()
        self.surface = pygame.Surface(self.size)
        self.surface.fill(bg)
        self.surface.blit(self.text, (0, 0))
        self.rect = pygame.Rect(self.x, self.y, self.size[0], self.size[1])

    def show(self):
        screen.blit(button1.surface, (self.x, self.y))

    def click(self, event):
        x, y = pygame.mouse.get_pos()
        if event.type == pygame.MOUSEBUTTONDOWN:
            if pygame.mouse.get_pressed()[0]:
                if self.rect.collidepoint(x, y):
                    self.change_text(self.feedback, bg="red")


def mainloop():
    """ The infinite loop where things happen """
    while True:
        for event in pygame.event.get():
            if event.type == pygame.QUIT:
                pygame.quit()
            button1.click(event)
        button1.show()
        clock.tick(30)
        pygame.display.update()


button1 = Button(
    "Click here",
    (100, 100),
    font=30,
    bg="navy",
    feedback="You clicked me")

mainloop()
Another way to make a button
This way is nicer and maybe easier to implement in a game.
This code defines a function button that creates a graphical button on a Pygame screen. The function takes three arguments: the screen on which to draw the button, a position tuple representing the x and y coordinates of the top-left corner of the button, and a text string to display on the button.
The button is created using Pygame drawing functions, including pygame.draw.rect() to draw a rectangle, and pygame.draw.line() to draw lines around the rectangle. The text is rendered using pygame.font.SysFont() and font.render().
The function then blits the text onto the screen using screen.blit(), and returns a pygame.Rect object representing the size and position of the button on the screen.
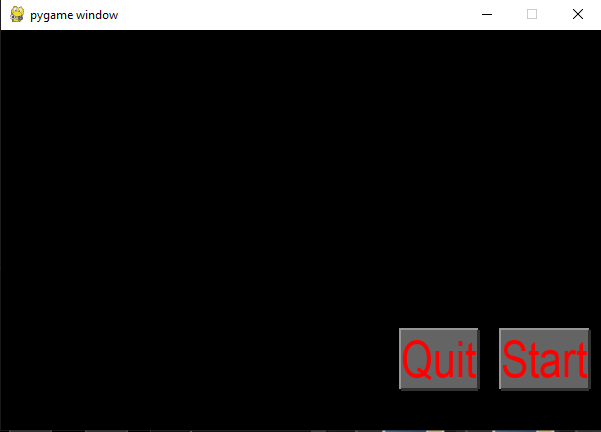
The menu() function creates two buttons using the button() function, one with the text “Quit” and one with the text “Start”. It then enters an infinite loop that handles Pygame events. If the user clicks on the “Quit” button, the program quits. If the user presses the “s” key or clicks on the “Start” button, the start() function is called.
Still another way, even better
import pygame

pygame.init()
screen = pygame.display.set_mode((600, 400))

def button(screen, position, text):
    font = pygame.font.SysFont("Arial", 50)
    text_render = font.render(text, 1, (255, 0, 0))
    x, y, w , h = text_render.get_rect()
    x, y = position
    pygame.draw.line(screen, (150, 150, 150), (x, y), (x + w , y), 5)
    pygame.draw.line(screen, (150, 150, 150), (x, y - 2), (x, y + h), 5)
    pygame.draw.line(screen, (50, 50, 50), (x, y + h), (x + w , y + h), 5)
    pygame.draw.line(screen, (50, 50, 50), (x + w , y+h), [x + w , y], 5)
    pygame.draw.rect(screen, (100, 100, 100), (x, y, w , h))
    print("screen.blit...", screen.blit(text_render, (x, y)))
    return screen.blit(text_render, (x, y)) # this is a rect pygame.Rect

def start():
    print("Ok, let's go")

def menu():
    """ This is the menu that waits you to click the s key to start """
    b1 = button(screen, (400, 300), "Quit") # this is a pygame.Rect?
    print(type(b1))
    b2 = button(screen, (500, 300), "Start")
    while True:
        for event in pygame.event.get():
            if (event.type == pygame.QUIT):
                pygame.quit()
            if event.type == pygame.KEYDOWN:
                if event.key == pygame.K_ESCAPE:
                    pygame.quit()
            if event.type == pygame.MOUSEBUTTONDOWN:
                if b1.collidepoint(pygame.mouse.get_pos()): # checks a collision with a pygame.Rect and the mouse pos
                    pygame.quit()
                elif b2.collidepoint(pygame.mouse.get_pos()):
                    start()
        pygame.display.update()
    pygame.quit()

menu()
pygame.quit()
We can add some come to make some actions pressing some keys too.
import pygame

pygame.init()
screen = pygame.display.set_mode((600, 400))

def button(screen, position, text):
    font = pygame.font.SysFont("Arial", 50)
    text_render = font.render(text, 1, (255, 0, 0))
    x, y, w , h = text_render.get_rect()
    x, y = position
    pygame.draw.line(screen, (150, 150, 150), (x, y), (x + w , y), 5)
    pygame.draw.line(screen, (150, 150, 150), (x, y - 2), (x, y + h), 5)
    pygame.draw.line(screen, (50, 50, 50), (x, y + h), (x + w , y + h), 5)
    pygame.draw.line(screen, (50, 50, 50), (x + w , y+h), [x + w , y], 5)
    pygame.draw.rect(screen, (100, 100, 100), (x, y, w , h))
    print("screen.blit...", screen.blit(text_render, (x, y)))
    return screen.blit(text_render, (x, y)) # this is a rect pygame.Rect

def start():
    print("Ok, let's go")

def menu():
    """ This is the menu that waits you to click the s key to start """
    b1 = button(screen, (400, 300), "Quit") # this is a pygame.Rect?
    print(type(b1))
    b2 = button(screen, (500, 300), "Start")
    while True:
        for event in pygame.event.get():
            if (event.type == pygame.QUIT):
                pygame.quit()
            if event.type == pygame.KEYDOWN:
                if event.key == pygame.K_ESCAPE:
                    pygame.quit()
                possible_events = [
                    event.key == pygame.K_s,
                    event.key == pygame.K_RIGHT,
                    event.key == pygame.K_UP]
                if any(possible_events):
                    start()
            if event.type == pygame.MOUSEBUTTONDOWN:
                if b1.collidepoint(pygame.mouse.get_pos()): # checks a collision with a pygame.Rect and the mouse pos
                    pygame.quit()
                elif b2.collidepoint(pygame.mouse.get_pos()):
                    start()
        pygame.display.update()
    pygame.quit()

menu()
pygame.quit()
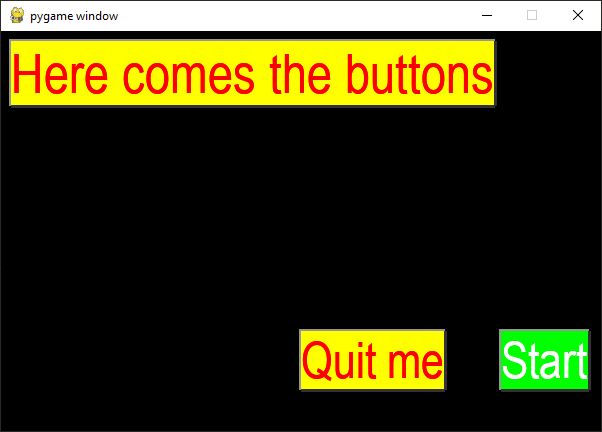
Customizable buttons
import pygame

pygame.init()
screen = pygame.display.set_mode((600, 400))

def button(screen, position, text, size, colors="white on blue"):
    fg, bg = colors.split(" on ")
    font = pygame.font.SysFont("Arial", size)
    text_render = font.render(text, 1, fg)
    x, y, w , h = text_render.get_rect()
    x, y = position
    pygame.draw.line(screen, (150, 150, 150), (x, y), (x + w , y), 5)
    pygame.draw.line(screen, (150, 150, 150), (x, y - 2), (x, y + h), 5)
    pygame.draw.line(screen, (50, 50, 50), (x, y + h), (x + w , y + h), 5)
    pygame.draw.line(screen, (50, 50, 50), (x + w , y+h), [x + w , y], 5)
    pygame.draw.rect(screen, bg, (x, y, w , h))
    print(screen.blit(text_render, (x, y)))
    return screen.blit(text_render, (x, y))

def start():
    print("Ok, let's go")

def menu():
    """ This is the menu that waits you to click the s key to start """
    # b0 contains the rect coordinates of the button
    b0 = button(screen, (10, 10), "Here comes the buttons", 55, "red on yellow")
    b1 = button(screen, (300, 300), "Quit me", 50, "red on yellow")
    b2 = button(screen, (500, 300), "Start", 50, "white on green")
    while True:
        for event in pygame.event.get():
            if (event.type == pygame.QUIT):
                pygame.quit()
            if event.type == pygame.KEYDOWN:
                if event.key == pygame.K_ESCAPE:
                    pygame.quit()
                key_to_start = event.key == pygame.K_s or event.key == pygame.K_RIGHT or event.key == pygame.K_UP
                if key_to_start:
                    start()
            if event.type == pygame.MOUSEBUTTONDOWN:
                # check when you click if the coordinates of the pointer are in the rectangle of the buttons
                if b1.collidepoint(pygame.mouse.get_pos()):
                    pygame.quit()
                elif b2.collidepoint(pygame.mouse.get_pos()):
                    start()
        pygame.display.update()
    pygame.quit()

menu()
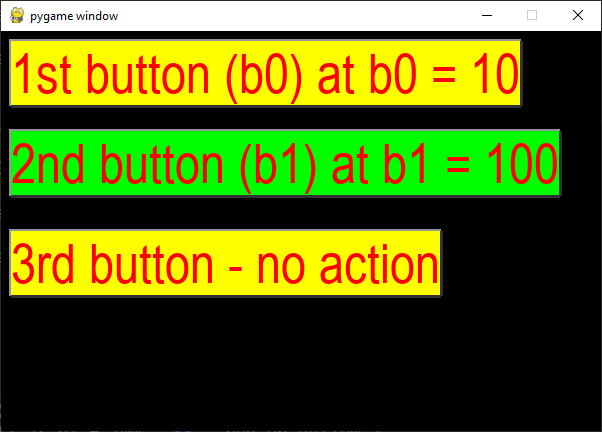
Hover effect over a button
With this changes in the script now the button def has become a class. Now you can make the hover effect on each button:
- define the istance of the class Button
- surface (screen)
- position
- text
- size
- color ex: “red on yellow”
- then do the if collidepoint for the hover effect and for the action (line 62 and 69)
import pygame

pygame.init()
screen = pygame.display.set_mode((600, 400))

buttons = pygame.sprite.Group()
class Button(pygame.sprite.Sprite):
    def __init__(self, screen, position, text, size, colors="white on blue"):
        super().__init__()
        self.colors = colors
        self.fg, self.bg = self.colors.split(" on ")
        self.font = pygame.font.SysFont("Arial", size)
        self.text_render = self.font.render(text, 1, self.fg)
        self.image = self.text_render
        self.x, self.y, self.w , self.h = self.text_render.get_rect()
        self.x, self.y = position
        self.rect = pygame.Rect(self.x, self.y, self.w, self.h)
        self.position = position
        self.update()
        buttons.add(self)

    def update(self):
        self.fg, self.bg = self.colors.split(" on ")
        pygame.draw.line(screen, (150, 150, 150), (self.x, self.y), (self.x + self.w , self.y), 5)
        pygame.draw.line(screen, (150, 150, 150), (self.x, self.y - 2), (self.x, self.y + self.h), 5)
        pygame.draw.line(screen, (50, 50, 50), (self.x, self.y + self.h), (self.x + self.w , self.y + self.h), 5)
        pygame.draw.line(screen, (50, 50, 50), (self.x + self.w , self.y + self.h), [self.x + self.w , self.y], 5)
        pygame.draw.rect(screen, self.bg, (self.x, self.y, self.w , self.h))
        # screen.blit(self.text_render, self.position)

        # self.rect = screen, position, text, size, colors="white on blue"screen.blit(self.text_render, (self.x, self.y))


def start():
    print("Ok, let's go")


def not_hover():
    for x in buttons:
        x.colors = "red on yellow"
        x.update()

def menu():
    """ This is the menu that waits you to click the s key to start """


    while True:
        for event in pygame.event.get():
            if (event.type == pygame.QUIT):
                pygame.quit()


            if event.type == pygame.KEYDOWN:
                if event.key == pygame.K_ESCAPE:
                    pygame.quit()
                key_to_start = event.key == pygame.K_s or event.key == pygame.K_RIGHT or event.key == pygame.K_UP
                if key_to_start:
                    start()
            if event.type == pygame.MOUSEMOTION:
                # 2. put the collide check for mouse hover here for each button
                if b0.rect.collidepoint(pygame.mouse.get_pos()):
                    b0.colors = "red on green"
                elif b1.rect.collidepoint(pygame.mouse.get_pos()):
                    b1.colors = "red on green"
                elif b2.rect.collidepoint(pygame.mouse.get_pos()):
                    b2.colors = "red on green"
                else:
                    # this will work for every buttons going back to original color after mouse goes out
                    not_hover()
            if event.type == pygame.MOUSEBUTTONDOWN:
                # 3. here the interactions with the click of the mouse... done
                if b0.rect.collidepoint(pygame.mouse.get_pos()):
                    print(b0.y)
                if b1.rect.collidepoint(pygame.mouse.get_pos()):
                    print(b1.y)
        buttons.update()
        buttons.draw(screen)
        pygame.display.update()
    pygame.quit()
# 1 - create the buttons with an istance of Button here...
b0 = Button(screen, (10, 10), "1st button (b0) at b0 = 10", 55, "red on yellow")
b1 = Button(screen, (10, 100), "2nd button (b1) at b1 = 100", 55, "red on yellow")
# This button has no interaction (69 add...)
b2 = Button(screen, (10, 200), "3rd button - no action", 55, "red on yellow")
print(b0.x)
# follow the comments to add buttons:
# 1 - create the buttons with an istance of Button here... line 80
# 2. put the collide check for mouse hover here for each button.... line 62
# 3. here the interactions with the click of the mouse... done line 69

menu()
Making a better code to highlight and to bind the action to the click on the buttons
You can find the code here https://github.com/formazione/pygame_button.git
But I will show it also here:
import pygame

pygame.init()
screen = pygame.display.set_mode((600, 400))
clock = pygame.time.Clock()

buttons = pygame.sprite.Group()

class Button(pygame.sprite.Sprite):
    def __init__(self, screen, position, text, size, colors="white on blue"):
        super().__init__()
        self.colors = colors
        self.fg, self.bg = self.colors.split(" on ")
        self.font = pygame.font.SysFont("Arial", size)
        self.text_render = self.font.render(text, 1, self.fg)
        self.image = self.text_render
        self.x, self.y, self.w , self.h = self.text_render.get_rect()
        self.x, self.y = position
        self.rect = pygame.Rect(self.x, self.y, self.w, self.h)
        self.position = position
        self.update()
        self.pressed = 1
        buttons.add(self)

    def update(self):

        self.fg, self.bg = self.colors.split(" on ")
        pygame.draw.line(screen, (150, 150, 150), (self.x, self.y), (self.x + self.w , self.y), 5)
        pygame.draw.line(screen, (150, 150, 150), (self.x, self.y - 2), (self.x, self.y + self.h), 5)
        pygame.draw.line(screen, (50, 50, 50), (self.x, self.y + self.h), (self.x + self.w , self.y + self.h), 5)
        pygame.draw.line(screen, (50, 50, 50), (self.x + self.w , self.y + self.h), [self.x + self.w , self.y], 5)
        pygame.draw.rect(screen, self.bg, (self.x, self.y, self.w , self.h))
        # screen.blit(self.text_render, self.position)

        # self.rect = screen, position, text, size, colors="white on blue"screen.blit(self.text_render, (self.x, self.y))
        if self.rect.collidepoint(pygame.mouse.get_pos()):
            self.colors = "red on green"
        else:
            self.colors = "red on yellow"
        if self.rect.collidepoint(pygame.mouse.get_pos()):
            if pygame.mouse.get_pressed()[0] and self.pressed == 1:
                print(self.position)
                self.pressed = 0
            if pygame.mouse.get_pressed() == (0,0,0):
                self.pressed = 1


def start():
    print("Ok, let's go")


def menu():
    """ This is the menu that waits you to click the s key to start """


    while True:
        for event in pygame.event.get():
            if (event.type == pygame.QUIT):
                pygame.quit()


            if event.type == pygame.KEYDOWN:
                if event.key == pygame.K_ESCAPE:
                    pygame.quit()
                key_to_start = event.key == pygame.K_s or event.key == pygame.K_RIGHT or event.key == pygame.K_UP
                if key_to_start:
                    start()


        buttons.update()
        buttons.draw(screen)
        clock.tick(60)
        pygame.display.update()
    pygame.quit()
# 1 - create the buttons with an istance of Button here...
b0 = Button(screen, (10, 10), "1st button (b0) at b0 = 10", 55, "red on yellow")
b1 = Button(screen, (10, 100), "2nd button (b1) at b1 = 100", 55, "red on yellow")
# This button has no interaction (69 add...)
b2 = Button(screen, (10, 200), "3rd button - no action", 55, "red on yellow")
print(b0.x)
# follow the comments to add buttons:
# 1 - create the buttons with an istance of Button here... line 80
# 2. put the collide check for mouse hover here for each button.... line 62
# 3. here the interactions with the click of the mouse... done line 69

menu()
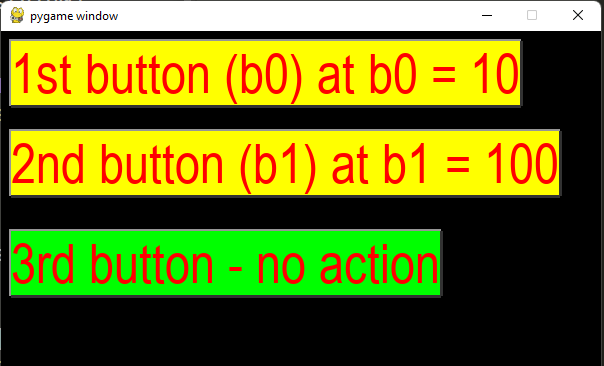
It does the same things, but the code it’s easier to implement now. Still I got to fix the action to bind to the buttons. For the moment there is only a print statement as example.
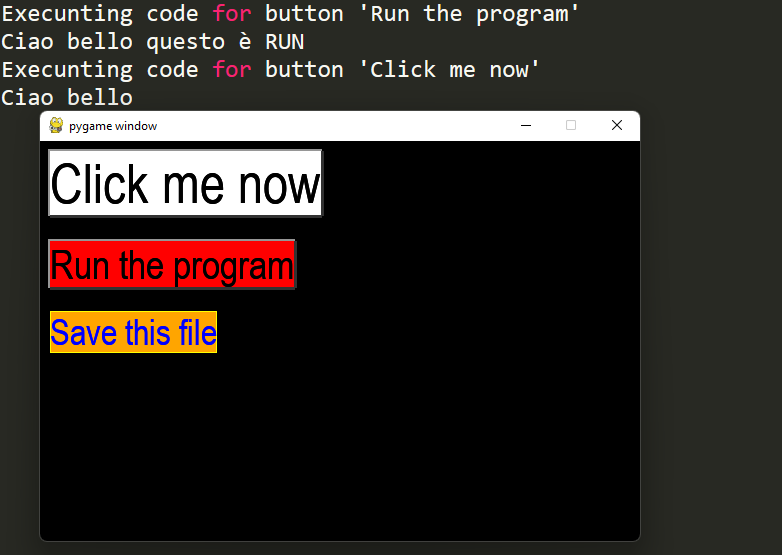
Definitive version with Actions on click
Ok, now the basic feature are all in the class. Now we can easily add a command to each button with the argument command
in this function I put all the buttons
def buttons_def():
    b0 = Button((10, 10), "Click me now", 55, "black on white",
        command=on_click)
    b1 = Button((10, 100), "Run the program", 40, "black on red", command=on_run)

    b2 = Button((10, 170), "Save this file", 36, "red on yellow",
        hover_colors="blue on orange", style=2, borderc=(255,255,0),
        command=on_save)
This is a video that shows how it works
The code is in this github repository. You can use the main.py file or just the buttons2.py in the folder code
The code is this anyhow (the one in one file)
import pygame
import pygame.gfxdraw


pygame.init()
screen = pygame.display.set_mode((600, 400))
clock = pygame.time.Clock()
buttons = pygame.sprite.Group()
class Button(pygame.sprite.Sprite):
    def __init__(self, position, text, size,
        colors="white on blue",
        hover_colors="red on green",
        style=1, borderc=(255,255,255),
        command=lambda: print("No command activated for this button")):
        # the hover_colors attribute needs to be fixed
        super().__init__()
        self.text = text
        self.command = command
        # --- colors ---
        self.colors = colors
        self.original_colors = colors
        self.fg, self.bg = self.colors.split(" on ")
        if hover_colors == "red on green":
            self.hover_colors = f"{self.bg} on {self.fg}"
        else:
            self.hover_colors = hover_colors
        self.style = style
        self.borderc = borderc # for the style2
        # font
        self.font = pygame.font.SysFont("Arial", size)
        self.render()
        self.x, self.y, self.w , self.h = self.text_render.get_rect()
        self.x, self.y = position
        self.rect = pygame.Rect(self.x, self.y, self.w, self.h)
        self.position = position
        self.pressed = 1
        buttons.add(self)

    def render(self):
        self.text_render = self.font.render(self.text, 1, self.fg)
        self.image = self.text_render

    def update(self):
        self.fg, self.bg = self.colors.split(" on ")
        if self.style == 1:
            self.draw_button1()
        elif self.style == 2:
            self.draw_button2()
        self.hover()
        self.click()

    def draw_button1(self):
        ''' draws 4 lines around the button and the background '''
        # horizontal up
        pygame.draw.line(screen, (150, 150, 150), (self.x, self.y), (self.x + self.w , self.y), 5)
        pygame.draw.line(screen, (150, 150, 150), (self.x, self.y - 2), (self.x, self.y + self.h), 5)
        # horizontal down
        pygame.draw.line(screen, (50, 50, 50), (self.x, self.y + self.h), (self.x + self.w , self.y + self.h), 5)
        pygame.draw.line(screen, (50, 50, 50), (self.x + self.w , self.y + self.h), [self.x + self.w , self.y], 5)
        # background of the button
        pygame.draw.rect(screen, self.bg, (self.x, self.y, self.w , self.h))

    def draw_button2(self):
        ''' a linear border '''
        pygame.draw.rect(screen, self.bg, (self.x, self.y, self.w , self.h))
        pygame.gfxdraw.rectangle(screen, (self.x, self.y, self.w , self.h), self.borderc)

    def hover(self):
        ''' checks if the mouse is over the button and changes the color if it is true '''
        if self.rect.collidepoint(pygame.mouse.get_pos()):
            # you can change the colors when the pointer is on the button if you want
            self.colors = self.hover_colors
            # pygame.mouse.set_cursor(*pygame.cursors.diamond)
        else:
            self.colors = self.original_colors

        self.render()

    def click(self):
        ''' checks if you click on the button and makes the call to the action just one time'''
        if self.rect.collidepoint(pygame.mouse.get_pos()):
            if pygame.mouse.get_pressed()[0] and self.pressed == 1:
                print("Execunting code for button '" + self.text + "'")
                self.command()
                self.pressed = 0
            if pygame.mouse.get_pressed() == (0,0,0):
                self.pressed = 1


# FUNCTIONS for the buttons on click
# I used this convention ... on_+text of the button

def on_click():
    print("Ciao bello")

def on_run():
    print("Ciao bello questo è RUN")

def on_save():
    print("This is Save")

def buttons_def():
    b0 = Button((10, 10), "Click me now", 55, "black on white",
        command=on_click)
    b1 = Button((10, 100), "Run the program", 40, "black on red", command=on_run)

    b2 = Button((10, 170), "Save this file", 36, "red on yellow",
        hover_colors="blue on orange", style=2, borderc=(255,255,0),
        command=on_save)

# ======================= this code is just for example, start the program from the main file
# in the main folder, I mean, you can also use this file only, but I prefer from the main file
# 29.8.2021

if __name__ == '__main__':
    pygame.init()
    game_on = 0
    def loop():
        # BUTTONS ISTANCES
        game_on = 1
        buttons_def()
        while True:
            for event in pygame.event.get():
                if (event.type == pygame.QUIT):
                    game_on = 0
                    pygame.quit()
                if event.type == pygame.KEYDOWN:
                    if event.key == pygame.K_ESCAPE:
                        pygame.quit()
                        game_on = 0
            if game_on:
                buttons.update()
                buttons.draw(screen)
            else:
                pygame.quit()
                sys.exit()
            buttons.draw(screen)
            clock.tick(60)
            pygame.display.update()
        pygame.quit()


    loop()
This is the output
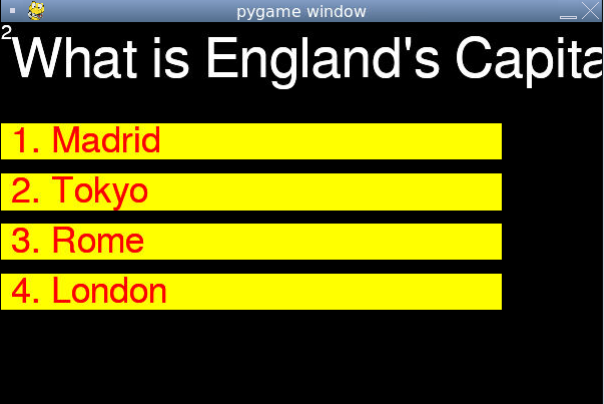
Using the button class to make a test in pygame
Go here to see the latest updates of this code https://github.com/formazione/pygame_button
import pygame
import pygame.gfxdraw
import sys
import time
import random


pygame.init()
screen = pygame.display.set_mode((600, 400))
clock = pygame.time.Clock()
buttons = pygame.sprite.Group()
num = 1
class Button(pygame.sprite.Sprite):

    def __init__(self, position, text, size,
        colors="white on blue",
        hover_colors="red on green",
        style=1,
        borderc=(255,255,255),
        command=lambda: print("No command activated for this button")):

        # the hover_colors attribute needs to be fixed
        super().__init__()
        global num


        self.text = text

        self.command = command
        # --- colors ---
        self.colors = colors
        self.original_colors = colors
        self.fg, self.bg = self.colors.split(" on ")

        if hover_colors == "red on green":
            self.hover_colors = f"{self.bg} on {self.fg}"
        else:
            self.hover_colors = hover_colors

        self.style = style
        self.borderc = borderc # for the style2
        # font
        self.font = pygame.font.SysFont("Arial", size)
        self.render(self.text)
        self.x, self.y, self.w , self.h = self.text_render.get_rect()
        self.x, self.y = position
        self.rect = pygame.Rect(self.x, self.y, 500, self.h)
        self.position = position
        self.pressed = 1
        # the groups with all the buttons
        buttons.add(self)

    def render(self, text):
        # we have a surface
        self.text_render = self.font.render(text, 1, self.fg)
        # memorize the surface in the image attributes
        self.image = self.text_render

    def update(self):
        self.fg, self.bg = self.colors.split(" on ")
        if self.style == 1:
            self.draw_button1()
        elif self.style == 2:
            self.draw_button2()
        if self.command != None:
            self.hover()
            self.click()

    def draw_button1(self):
        ''' draws 4 lines around the button and the background '''
        # horizontal up
        pygame.draw.line(screen, (150, 150, 150), (self.x, self.y), (self.x + self.w , self.y), 5)
        pygame.draw.line(screen, (150, 150, 150), (self.x, self.y - 2), (self.x, self.y + self.h), 5)
        # horizontal down
        pygame.draw.line(screen, (50, 50, 50), (self.x, self.y + self.h), (self.x + self.w , self.y + self.h), 5)
        pygame.draw.line(screen, (50, 50, 50), (self.x + self.w , self.y + self.h), [self.x + self.w , self.y], 5)
        # background of the button
        pygame.draw.rect(screen, self.bg, (self.x, self.y, self.w , self.h))

    def draw_button2(self):
        ''' a linear border '''
        pygame.draw.rect(screen, self.bg, (self.x - 50, self.y, 500 , self.h))
        pygame.gfxdraw.rectangle(screen, (self.x - 50, self.y, 500 , self.h), self.borderc)

    def check_collision(self):
        if self.rect.collidepoint(pygame.mouse.get_pos()):
            # you can change the colors when the pointer is on the button if you want
            self.colors = self.hover_colors
            # pygame.mouse.set_cursor(*pygame.cursors.diamond)
        else:
            self.colors = self.original_colors
            # pygame.mouse.set_cursor(*pygame.cursors.arrow)


    def hover(self):
        ''' checks if the mouse is over the button and changes the color if it is true '''
        if self.style == 1:
            self.check_collision()
            self.render()
        else:
            self.check_collision()

    def click(self):
        ''' checks if you click on the button and makes the call to the action just one time'''
        if self.rect.collidepoint(pygame.mouse.get_pos()):
            if pygame.mouse.get_pressed()[0] and self.pressed == 1:
                print("The answer is:'" + self.text + "'")
                self.command()
                self.pressed = 0
            if pygame.mouse.get_pressed() == (0,0,0):
                self.pressed = 1


# FUNCTIONS for the buttons on click
# I used this convention ... on_+text of the button

def on_click():
    print("Click on one answer")

def on_run():
    print("Ciao bello questo è RUN")

def on_save():
    print("This is Save")

def on_right():
    print("Right")
    forward()

def on_false():
    print("Wrong")
    forward()

def forward():
    global qnum

    screen.fill(0)
    if qnum < len(questions):
        time.sleep(.3)
        qnum += 1
        question(qnum)


questions = [
    ["What is Italy's Capital?", ["Rome", "Paris", "Tokyo", "Madrid"]],
    ["What is France's Capital?", ["Paris", "Rome", "Tokyo", "Madrid"]],
    ["What is England's Capital?", ["London", "Rome", "Tokyo", "Madrid"]],
]


def question(qnum):
    ''' put your buttons here '''

    for sprites in buttons:
        sprites.kill()

    pos = [100, 150, 200, 250]
    random.shuffle(pos)
    # this is a label, a button with no border does nothing: command = None
    Button((0, 0), str(qnum-1), 20, "white on black",
        hover_colors="blue on orange", style=2, borderc=(0,0,0),
        command=None)

    Button((10, 10), questions[qnum-1][0], 55, "white on black",
        hover_colors="blue on orange", style=2, borderc=(0,0,0),
        command=None)

    # ______------_____ BUTTONS FOR ANSWERS _____------______ #

    Button((10, 100), "1. ", 36, "red on yellow",
        hover_colors="blue on orange", style=2, borderc=(255,255,0),
        command=None)
    Button((10, 150), "2. ", 36, "red on yellow",
        hover_colors="blue on orange", style=2, borderc=(255,255,0),
        command=None)
    Button((10, 200), "3. ", 36, "red on yellow",
        hover_colors="blue on orange", style=2, borderc=(255,255,0),
        command=None)
    Button((10, 250), "4. ", 36, "red on yellow",
        hover_colors="blue on orange", style=2, borderc=(255,255,0),
        command=None)

    Button((50, pos[0]), questions[qnum-1][1][0], 36, "red on yellow",
        hover_colors="blue on orange", style=2, borderc=(255,255,0),
        command=on_right)


    Button((50, pos[1]), questions[qnum-1][1][1], 36, "red on yellow",
        hover_colors="blue on orange", style=2, borderc=(255,255,0),
        command=on_false)

    Button((50, pos[2]), questions[qnum-1][1][2], 36, "red on yellow",
        hover_colors="blue on orange", style=2, borderc=(255,255,0),
        command=on_false)

    Button((50, pos[3]), questions[qnum-1][1][3], 36, "red on yellow",
        hover_colors="blue on orange", style=2, borderc=(255,255,0),
        command=on_false)

# ======================= this code is just for example, start the program from the main file
# in the main folder, I mean, you can also use this file only, but I prefer from the main file
# 29.8.2021
qnum = 1
if __name__ == '__main__':
    pygame.init()
    game_on = 0
    def loop():
        # BUTTONS ISTANCES
        global qnum


        game_on = 1
        question(qnum)
        while True:
            screen.fill(0)
            for event in pygame.event.get():
                if (event.type == pygame.QUIT):
                    game_on = 0
                    pygame.quit()
                if event.type == pygame.KEYDOWN:
                    if event.key == pygame.K_ESCAPE:
                        pygame.quit()
                        game_on = 0
            if game_on:
                buttons.update()
                buttons.draw(screen)
            else:
                pygame.quit()
                sys.exit()
            buttons.draw(screen)
            clock.tick(60)
            pygame.display.update()
        pygame.quit()


    loop()
https://replit.com/join/qkuojrzriv-educationalchan
You can see a more mature version of quizpy here
https://replit.com/@EducationalChan/pyquiz
The code
import pygame
import pygame.gfxdraw
import sys
import time
import random
# the Label class is this module below
from label import *
pygame.init()
pygame.mixer.init()
hit = pygame.mixer.Sound("sounds/hit.wav")
screen = pygame.display.set_mode((1200, 1200))
clock = pygame.time.Clock()
buttons = pygame.sprite.Group()
class Button(pygame.sprite.Sprite):
''' A button treated like a Sprite... and killed too '''
def __init__(self, position, text, size,
colors="white on blue",
hover_colors="red on green",
style="button1",
borderc=(255,255,255),
command=lambda: print("No command activated for this button")):
# the hover_colors attribute needs to be fixed
super().__init__()
global num
self.text = text
self.command = command
# --- colors ---
self.colors = colors
self.original_colors = colors
self.fg, self.bg = self.colors.split(" on ")
if hover_colors == "red on green":
self.hover_colors = f"{self.bg} on {self.fg}"
else:
self.hover_colors = hover_colors
self.style = style
self.borderc = borderc # for the style2
# font
self.font = pygame.font.SysFont("Arial", size)
self.render(self.text)
self.x, self.y, self.w , self.h = self.text_render.get_rect()
self.x, self.y = position
self.rect = pygame.Rect(self.x, self.y, 500, self.h)
self.position = position
self.pressed = 1
# the groups with all the buttons
buttons.add(self)
def render(self, text):
# we have a surface
self.text_render = self.font.render(text, 1, self.fg)
# memorize the surface in the image attributes
self.image = self.text_render
def update(self):
self.fg, self.bg = self.colors.split(" on ")
if self.style == "button1":
self.draw_button1()
elif self.style == "button2":
self.draw_button2()
if self.command != None:
self.hover()
self.click()
def draw_button1(self):
''' draws 4 lines around the button and the background '''
# horizontal up
pygame.draw.line(screen, (150, 150, 150), (self.x, self.y), (self.x + self.w , self.y), 5)
pygame.draw.line(screen, (150, 150, 150), (self.x, self.y - 2), (self.x, self.y + self.h), 5)
# horizontal down
pygame.draw.line(screen, (50, 50, 50), (self.x, self.y + self.h), (self.x + self.w , self.y + self.h), 5)
pygame.draw.line(screen, (50, 50, 50), (self.x + self.w , self.y + self.h), [self.x + self.w , self.y], 5)
# background of the button
pygame.draw.rect(screen, self.bg, (self.x, self.y, self.w , self.h))
def draw_button2(self):
''' a linear border '''
pygame.draw.rect(screen, self.bg, (self.x - 50, self.y, 500 , self.h))
pygame.gfxdraw.rectangle(screen, (self.x - 50, self.y, 500 , self.h), self.borderc)
def check_collision(self):
if self.rect.collidepoint(pygame.mouse.get_pos()):
# you can change the colors when the pointer is on the button if you want
self.colors = self.hover_colors
# pygame.mouse.set_cursor(*pygame.cursors.diamond)
else:
self.colors = self.original_colors
# pygame.mouse.set_cursor(*pygame.cursors.arrow)
def hover(self):
''' checks if the mouse is over the button and changes the color if it is true '''
self.check_collision()
def click(self):
''' checks if you click on the button and makes the call to the action just one time'''
if self.rect.collidepoint(pygame.mouse.get_pos()):
if pygame.mouse.get_pressed()[0] and self.pressed == 1:
print("The answer is:'" + self.text + "'")
self.command()
self.pressed = 0
if pygame.mouse.get_pressed() == (0,0,0):
self.pressed = 1
# ACTION FOR BUTTON CLICK ================
def on_click():
print("Click on one answer")
def on_right():
check_score("right")
def on_false():
''' if there is no 'right' as arg it means it's false '''
check_score()
def check_score(answered="wrong"):
''' here we check if the answer is right '''
global qnum, points
# until there are questions (before last)
hit.play() # click sound
if qnum < len(questions):
print(qnum, len(questions))
if answered == "right":
time.sleep(.1) # to avoid adding more point when pressing too much
points += 1
# Show the score text
qnum += 1 # counter for next question in the list
score.change_text(str(points))
# Change the text of the question
title.change_text(questions[qnum-1][0], color="white")
# change the question number
num_question.change_text(str(qnum))
show_question(qnum) # delete old buttons and show new
# for the last question...
elif qnum == len(questions):
print(qnum, len(questions))
if answered == "right":
kill()
time.sleep(.1)
points +=1
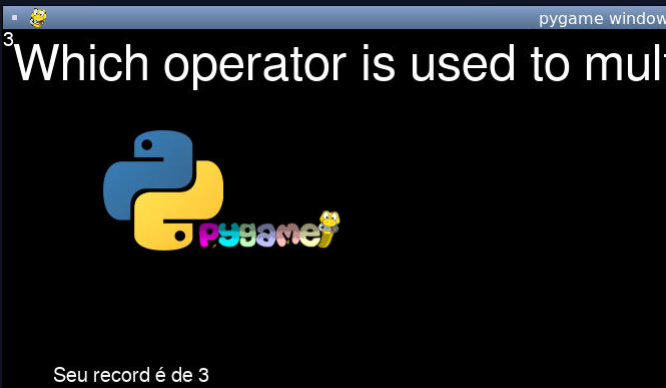
score.change_text("Seu record é de " + str(points))
time.sleep(.5)
# the first answer is right: it will be shuffled, don't worry
# ============================================================
questions = [
["What is the correct file extension for Python files?",
[".py", ".pt", ".ppt", ".pdf"]],
["Which method can be used to remove any whitespace from both the beginning and the end of a string?",
["strip()", "trip()", "trim()", "len()"]],
["Which operator is used to multiply numbers?",
["*", "+", "-", "/"]],
]
# =========== END OF QUESTIONS AND ANSWERS =================
def show_question(qnum):
''' Show questions: '''
pos = [180,218,256,294] #
kill() # Kills the previous buttons/sprites
def numbers():
''' inner function: THE NUMBERS OF THE QUESTION IN ORDER 1 2 3 4 '''
# position of the numbers
for n in range(4):
Button((10, pos[n]),
f"{n+1} ",
36,
"darkred on yellow",
hover_colors="darkred on orange",
style="button2",
borderc=(255,255,0),
command=None)
def questions_shuffler():
# show numbers and answers text
# ============== TEXT: question and answers ====================
comm =[on_right, on_false, on_false, on_false]
for n in range(4):
pass
Button(
(50, pos[n]),
questions[qnum-1][1][n],
36,
"blue on yellow",
hover_colors="blue on orange",
style="button2",
borderc=(255,255,0),
command=comm[n])
numbers()
random.shuffle(pos) # randomized, so that the right one is not on top
questions_shuffler()
def kill():
''' delete buttons when go to the next question '''
for _ in buttons:
_.kill()
qnum = 1
points = 0
# ================= SOME LABELS ==========================
num_question = Label(screen, str(qnum), 0, 0)
title = Label(screen, questions[qnum-1][0], 10, 10, 50, color="cyan")
score = Label(screen, "AV2 Programming", 50, 335)
write1 = Label(screen, "Maria Eduarda, Joana, Rafaela, Rafael", 50, 360, 20, color="white")
def start_again():
pass
def loop():
global game_on
show_question(qnum)
while True:
screen.fill(0)
for event in pygame.event.get(): # ====== quit / exit
if (event.type == pygame.QUIT):
pygame.quit()
if event.type == pygame.KEYDOWN:
if event.key == pygame.K_ESCAPE:
pygame.quit()
buttons.update() # update buttons
buttons.draw(screen)
show_labels()
# update labels
if points == 3:
winimg = pygame.image.load("python_pygame.png")
screen.blit(winimg, (100, 100))
clock.tick(60)
pygame.display.update()
pygame.quit()
if __name__ == '__main__':
pygame.init()
game_on = 1
loop()
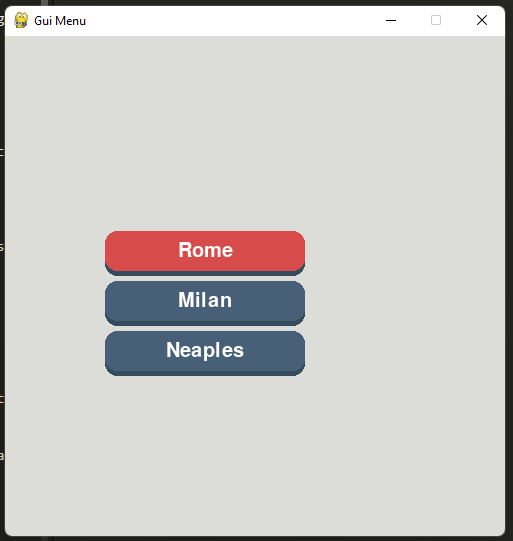
Even nicer button with animation
This buttons are nice, they have animation. I made some changes to someone else’s code.
import pygame, sys

buttons = []
class Button:
	def __init__(self,text,width,height,pos,elevation):
		#Core attributes
		self.pressed = False
		self.elevation = elevation
		self.dynamic_elecation = elevation
		self.original_y_pos = pos[1]

		# top rectangle
		self.top_rect = pygame.Rect(pos,(width,height))
		self.top_color = '#475F77'

		# bottom rectangle
		self.bottom_rect = pygame.Rect(pos,(width,height))
		self.bottom_color = '#354B5E'
		#text
		self.text = text
		self.text_surf = gui_font.render(text,True,'#FFFFFF')
		self.text_rect = self.text_surf.get_rect(center = self.top_rect.center)
		buttons.append(self)

	def change_text(self, newtext):
		self.text_surf = gui_font.render(newtext, True,'#FFFFFF')
		self.text_rect = self.text_surf.get_rect(center = self.top_rect.center)

	def draw(self):
		# elevation logic
		self.top_rect.y = self.original_y_pos - self.dynamic_elecation
		self.text_rect.center = self.top_rect.center

		self.bottom_rect.midtop = self.top_rect.midtop
		self.bottom_rect.height = self.top_rect.height + self.dynamic_elecation

		pygame.draw.rect(screen,self.bottom_color, self.bottom_rect,border_radius = 12)
		pygame.draw.rect(screen,self.top_color, self.top_rect,border_radius = 12)
		screen.blit(self.text_surf, self.text_rect)
		self.check_click()

	def check_click(self):
		mouse_pos = pygame.mouse.get_pos()
		if self.top_rect.collidepoint(mouse_pos):
			self.top_color = '#D74B4B'
			if pygame.mouse.get_pressed()[0]:
				self.dynamic_elecation = 0
				self.pressed = True
				self.change_text(f"{self.text}")
			else:
				self.dynamic_elecation = self.elevation
				if self.pressed == True:
					print('click')
					self.pressed = False
					self.change_text(self.text)
		else:
			self.dynamic_elecation = self.elevation
			self.top_color = '#475F77'

pygame.init()
screen = pygame.display.set_mode((500,500))
pygame.display.set_caption('Gui Menu')
clock = pygame.time.Clock()
gui_font = pygame.font.Font(None,30)

button1 = Button('Rome',200,40,(100,200),5)
button2 = Button('Milan',200,40,(100,250),5)
button3 = Button('Neaples',200,40,(100,300),5)


def buttons_draw():
	for b in buttons:
		b.draw()

while True:
	for event in pygame.event.get():
		if event.type == pygame.QUIT:
			pygame.quit()
			sys.exit()

	screen.fill('#DCDDD8')
	buttons_draw()

	pygame.display.update()
	clock.tick(60)
Change text when click
import pygame, sys

buttons = []
class Button:
	def __init__(self,text,translation,width,height,pos,elevation):
		#Core attributes
		self.pressed = False
		self.elevation = elevation
		self.dynamic_elecation = elevation
		self.original_y_pos = pos[1]

		# top rectangle
		self.top_rect = pygame.Rect(pos,(width,height))
		self.top_color = '#475F77'
		self.translation = translation
		# bottom rectangle
		self.bottom_rect = pygame.Rect(pos,(width,height))
		self.bottom_color = '#354B5E'
		#text
		self.text = text
		self.text_surf = gui_font.render(text,True,'#FFFFFF')
		self.text_rect = self.text_surf.get_rect(center = self.top_rect.center)
		buttons.append(self)

	def change_text(self, newtext):
		self.text_surf = gui_font.render(newtext, True,'#FFFFFF')
		self.text_rect = self.text_surf.get_rect(center = self.top_rect.center)

	def draw(self):
		# elevation logic
		self.top_rect.y = self.original_y_pos - self.dynamic_elecation
		self.text_rect.center = self.top_rect.center

		self.bottom_rect.midtop = self.top_rect.midtop
		self.bottom_rect.height = self.top_rect.height + self.dynamic_elecation

		pygame.draw.rect(screen,self.bottom_color, self.bottom_rect,border_radius = 12)
		pygame.draw.rect(screen,self.top_color, self.top_rect,border_radius = 12)
		screen.blit(self.text_surf, self.text_rect)
		self.check_click()

	def check_click(self):
		mouse_pos = pygame.mouse.get_pos()
		if self.top_rect.collidepoint(mouse_pos):
			self.top_color = '#D74B4B'
			if pygame.mouse.get_pressed()[0]:
				self.dynamic_elecation = 0
				self.pressed = True
				self.change_text(f"{self.translation}")
			else:
				self.dynamic_elecation = self.elevation
				if self.pressed == True:
					print('click')
					self.pressed = False
					self.change_text(self.text)
		else:
			self.dynamic_elecation = self.elevation
			self.top_color = '#475F77'

pygame.init()
screen = pygame.display.set_mode((500,500))
pygame.display.set_caption('Gui Menu')
clock = pygame.time.Clock()
gui_font = pygame.font.Font(None,30)

button1 = Button('Rome', "Roma",200,40,(100,200),5)
button2 = Button('Milan', "Milano",200,40,(100,250),5)
button3 = Button('Neaples',"Napoli",200,40,(100,300),5)
button3 = Button('Florence',"Firenze",200,40,(100,350),5)
button3 = Button('Venice',"Venezia",200,40,(100,400),5)


def buttons_draw():
	for b in buttons:
		b.draw()

while True:
	for event in pygame.event.get():
		if event.type == pygame.QUIT:
			pygame.quit()
			sys.exit()

	screen.fill('#DCDDD8')
	buttons_draw()

	pygame.display.update()
	clock.tick(60)
Make something different for every click of the different buttons
Ok, what you want to do is to make different things depending on what button you press. So here is a solution, to add another parameter to the istance of a button that refers to a function that does what you want that the button do when is clicked. Here is the code. If you do not assign a function to the button, there will be a warning, telling you how to do it.
import pygame, sys


def help_empty_command():
	''' function for buttons without command argument '''
	print(f"""[WARNING]:You have not assigned a function to
	 		your button. Create a function called command2, for
	  		example and add command2 as last parameter of the istance
	   		of this buttonex:
	   		button1 = Button('Rome',200,40,(100,200),5, command1))""")

buttons = []
class Button:
	def __init__(self,text,width,height,pos,elevation, command=help_empty_command):
		#Core attributes
		self.pressed = False
		self.elevation = elevation
		self.dynamic_elecation = elevation
		self.original_y_pos = pos[1]
		self.command = command

		# top rectangle
		self.top_rect = pygame.Rect(pos,(width,height))
		self.top_color = '#475F77'

		# bottom rectangle
		self.bottom_rect = pygame.Rect(pos,(width,height))
		self.bottom_color = '#354B5E'
		#text
		self.text = text
		self.text_surf = gui_font.render(text,True,'#FFFFFF')
		self.text_rect = self.text_surf.get_rect(center = self.top_rect.center)
		buttons.append(self)

	def change_text(self, newtext):
		self.text_surf = gui_font.render(newtext, True,'#FFFFFF')
		self.text_rect = self.text_surf.get_rect(center = self.top_rect.center)

	def draw(self):
		# elevation logic
		self.top_rect.y = self.original_y_pos - self.dynamic_elecation
		self.text_rect.center = self.top_rect.center

		self.bottom_rect.midtop = self.top_rect.midtop
		self.bottom_rect.height = self.top_rect.height + self.dynamic_elecation

		pygame.draw.rect(screen,self.bottom_color, self.bottom_rect,border_radius = 12)
		pygame.draw.rect(screen,self.top_color, self.top_rect,border_radius = 12)
		screen.blit(self.text_surf, self.text_rect)
		self.check_click()

	def check_click(self):
		mouse_pos = pygame.mouse.get_pos()
		if self.top_rect.collidepoint(mouse_pos):
			self.top_color = '#D74B4B'
			if pygame.mouse.get_pressed()[0]:
				self.dynamic_elecation = 0
				self.pressed = True
				self.change_text(f"{self.text}")
			else:
				self.dynamic_elecation = self.elevation
				if self.pressed == True:
					self.command()
					self.pressed = False
					self.change_text(self.text)
		else:
			self.dynamic_elecation = self.elevation
			self.top_color = '#475F77'


def command1():
	print("I am the first button command to be executed only when you press it. I ca do all the code is in the command1 function. So I can evolve, thanks to my programmer. Thanks.")


pygame.init()
screen = pygame.display.set_mode((500,500))
pygame.display.set_caption('Gui Menu')
clock = pygame.time.Clock()
gui_font = pygame.font.Font(None,30)

button1 = Button('Rome',200,40,(100,200),5, command1)
button2 = Button('Milan',200,40,(100,250),5)
button3 = Button('Neaples',200,40,(100,300),5)


def buttons_draw():
	for b in buttons:
		b.draw()

while True:
	for event in pygame.event.get():
		if event.type == pygame.QUIT:
			pygame.quit()
			sys.exit()

	screen.fill('#DCDDD8')
	buttons_draw()

	pygame.display.update()
	clock.tick(60)
Now we can say that the button widget is fully usable.
 Subscribe to the newsletter for updates
 Tkinter templates
Twitter: @pythonprogrammi - python_pygame
Videos
Speech recognition gamePygame's Platform Game
