This time we are going to show how to draw a rectangle on the canvas object in a tkinter window with the function move.
We are going to create a window:
import tkinter as tk

root = tk.Tk()
We define the width and height of the canvas. We define them, so that we can relate the position of the rectangle relatively to the size of the canvas and not in absolute, to have more control of the position of the first referred to the latter.
canvas_width, canvas_height = 600, 400
Then we define the starting point of the rectangle that is the middle of the w and h of the canvas yet defined.
x1, y1 = canvas_width // 2, canvas_height // 2
Then we create the canvas in the root window:
canvas = tk.Canvas(root, width=canvas_width, height=canvas_height)
canvas.pack()
The pack() method makes the canvas visible in the window. All the objects in the window must be placed on the window with pack() or grid() to be visible. This because there are more methods to place them on it.
We create also the rectangle
c1 = canvas.create_rectangle(x1, y1, x1 + 10, y1 + 10)
Now we define what happens when we call the keypress function. This function checks if you press a (fo left, that is a -10 variation because the coordinates of the canvas starts from 0 width to the left corner and increases towards right, so when you go left you decrease the coordinates, when you go right you increase them; same for up and down; being the op left coordinate 0, if you go down you increase that value, if you go up you decrease that one).
left = – 10 decrease the x coordinate
right = + 10 increase the x coordinate
up = – 10 decrease the y coordinate
down = + 10 increase the y coordinate
You can change the number 10 to “increase” the speed of the rectangle
def keypress(event):
    x = 0
    y = 0
    if event.char == "a": x = -10
    elif event.char == "d": x = 10
    elif event.char == "w": y = -10
    elif event.char == "s": y = 10
    canvas.move(c1, x, y)
The you have to use the bind method to make the computer listen to your keyboard input
root.bind("<Key>", keypress)
At the end, you have to put all the code in a loop to work until you close the window.
root.mainloop()
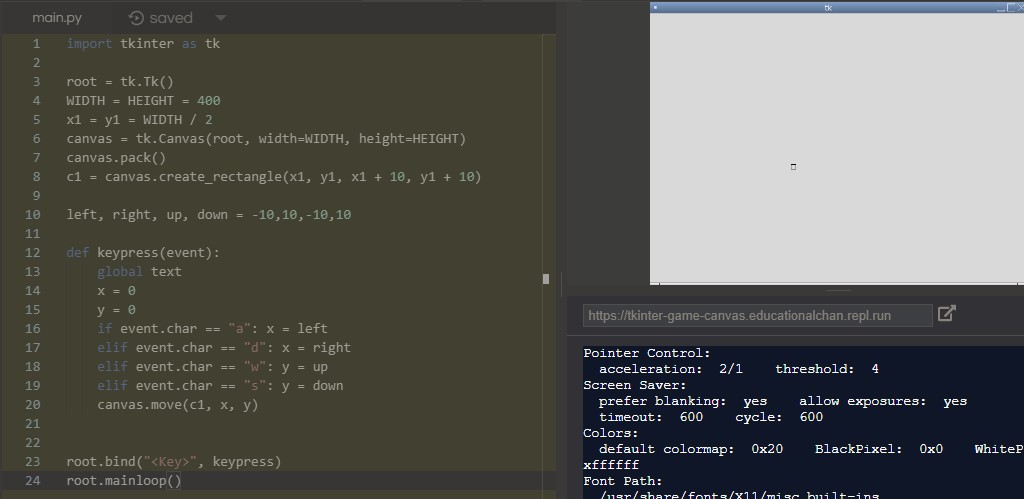
See the example in repl.it
Repl.it gives you the chance to see the code in action in the browser. It recently added also the tkinter module to it (I remember that I asked them if they were going to add it and they said yes and they actually did it a couple of months ago… it’s awesome).
Link to the repl with the example above (with some little differences).
The video explanation of the code
In this video you can see the simple explanation of the code above, so that you will be aware of how to create the window, add a canvas and a rectangle and move it with the bind and the move method.
The whole code to move a rectangle with tkinter
import tkinter as tk

root = tk.Tk()

canvas_width = 600
canvas_height = 400
w, h  = canvas_width // 2, canvas_height // 2
canvas = tk.Canvas(root, width=canvas_width, height = canvas_height)
canvas.pack()

r1 = canvas.create_rectangle(w,h, w+10, h+10)

def keypress(event):
	x, y = 0, 0
	if event.char == "a": x = -10;
	elif event.char == "d": x = 10
	elif event.char == "w": y = -10
	elif event.char == "s": y = 10
	canvas.move(r1, x, y)

root.bind("<Key>", keypress)

root.mainloop()
Adding a text into the rectangle
I made this update to answer to a question that was made to me on youtube. How to add a text into the rectangle? This was my answer.
import tkinter as tk

root = tk.Tk()

canvas_width = 600
canvas_height = 400
w = canvas_width // 2
h = canvas_height // 2
canvas = tk.Canvas(root, width=canvas_width, height=canvas_height)
canvas.pack()

r1 = canvas.create_rectangle(w, h, w + 40, h + 10)
t = canvas.create_text(w + 20, h + 5, text="Hello")


def keypress(event):
    """The 4 key press"""
    x, y = 0, 0
    if event.char == "a":
        x = -10
    if event.char == "d":
        x = 10
    if event.char == "w":
        y = -10
    if event.char == "s":
        y = 10
    canvas.move(r1, x, y)
    canvas.move(t, x, y)


root.bind("<Key>", keypress)
root.mainloop()
And this is a screenshot of the output
