What we made here
Publish an app or a blog on-line with Python and Glitch for free, in less the 20 minutes. In the last post (put our blog on the web for free with glitch) we’ve seen how to bring the blog we were making on the local server with visual studio code. We just copied the code from our project and we adapted it a little bit to make it run on the glitch.com (glitch.me) servers for free.
What we are going to know
Now, we want to start from scratch, in case you missed the first (9) parts of that series of posts about Flask. This is the fastest way to put your blog online for free. You can make a landpage o one page blog simply continuing to add data into the homepage.htm through the python code in run.py, into the post list of dictionaries. It will be all clear watching the video. You can also take a look at the blog I made for this tutorial here at https:\\flasktutorial.glitch.me . Sometimes it may happen that the change you make in the code takes some time to have effect.
This video will explain everything you need to know
The resulting blog can be seen here
The project is here. You can also remix it.
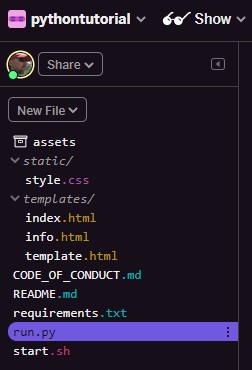
The code with in the files of thblog
Github repository with the code

start.sh
python run.py
Run.py
from flask import Flask, render_template

app = Flask(__name__)


@app.route("/")
def homepage():
  posts = [
    {"title": "How to use Python in Glitch",
    "body": "First you need an account on glitch.com, then you create a new project."
    },
    {"title": "Your first flask blog",
     "body": "First of all create a start.sh file with python run.py in it."
    }
  ]

  return render_template("index.html", posts=posts)

@app.route("/info")
def info():
  return """
  <h2>I'm Giovanni....</h2>
  <a href="/">Home</a>
  """

if __name__ == "__main__":
  app.run()
requirements.txt
Flask
gunicorn
templates/index.html
{% extends 'template.html' %}

{% block page %}
    <h1>How to create a blog with Python an Flask on glitch.com</h1>

   {% for post in posts %}

    <h3>
      {{ post.title }}
    </h3>
    <p>
      {{ post.body }}
    </p>

    {% endfor %}


  <a href="/info">Read the info</a>


{% endblock %}
templates/template.html
<!DOCTYPE html>
<html lang="en">
  <head>
    <title>Hello!</title>
    <meta charset="utf-8">
    <meta http-equiv="X-UA-Compatible" content="IE=edge">
    <meta name="viewport" content="width=device-width, initial-scale=1">

    <!-- import the webpage's stylesheet -->
    <link rel="stylesheet" href="{{ url_for('static', filename='style.css') }}">


  </head>
  <body>
    <h1>A tutorial to create a blog with Python an Flask on glitch.com</h1>

{% block page %}
{% endblock %}


  <a href="/info">Read the info</a>

  </body>
</html>
static/styl.css
body {
  font-family: "Benton Sans", "Helvetica Neue", helvetica, arial, sans-serif;
  margin: 2em;
}

h1 {
  font-style: italic;
  color: #373fff;
}
How to use my code as template
If you want to use my code as template without having to write everything and save all the initial files, go into the import from github voice (click on import on the left bottom of the page and then git import, export).
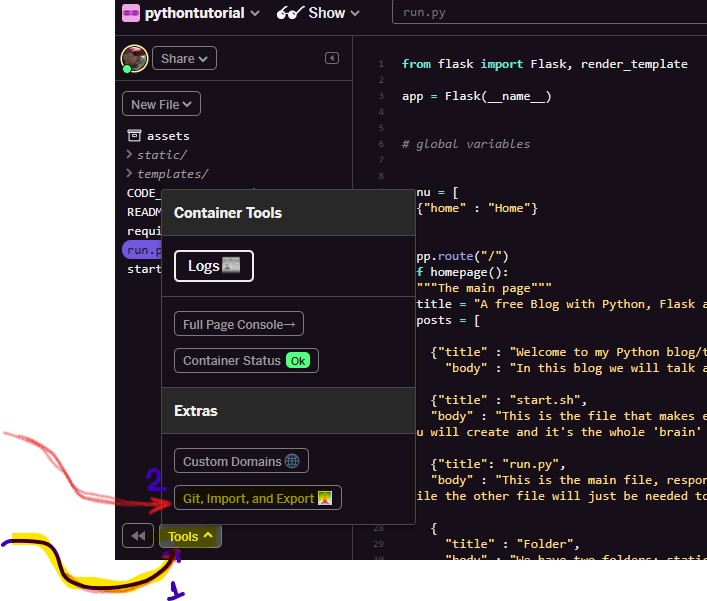
Once you click on import… write in the pop up that appears on the top of the page:
formazione/flask
You will have all the basic files in your new project.
You can also remix my project of course.
The list of files of the basic project